Gravwell's kit builder makes it easy to collect things you've built--dashboards, scheduled searches, and so on--into a single file you can version control your insights. Not to mention, packing your insights as a kit makes them easy to share with others. Once the kit is built, though, you're left with that single, opaque file. How do you modify it? How can others add to it? "Detection as code" or "infrastructure as code" applies to the searches and dashboards you make within the Gravwell platform as well. We're releasing a tool to make that easier! Meet Kitctl.
Kitctl is a new Gravwell tool for manipulating kits. It can unpack a kit file into a file structure that's easy to work with, then re-pack it after you've made your modifications. The unpacked structure is designed to work well with Git, so you can put your kit into a public repository and let others make pull requests. This blog post will demonstrate kitctl by experimenting with an official Gravwell kit.
Install Kitctl
Assuming you have Go installed, getting kitctl is simply a matter of checking out the repository and building the command:
$ git clone https://github.com/gravwell/gravwell
$ cd gravwell/kitctl
$ go install
By default, Go should put the binary into ~/go/bin. This post assumes you have that directory included in your $PATH.
Unpack the Kit
First, download the Netflow v5 kit from the Gravwell kits UI: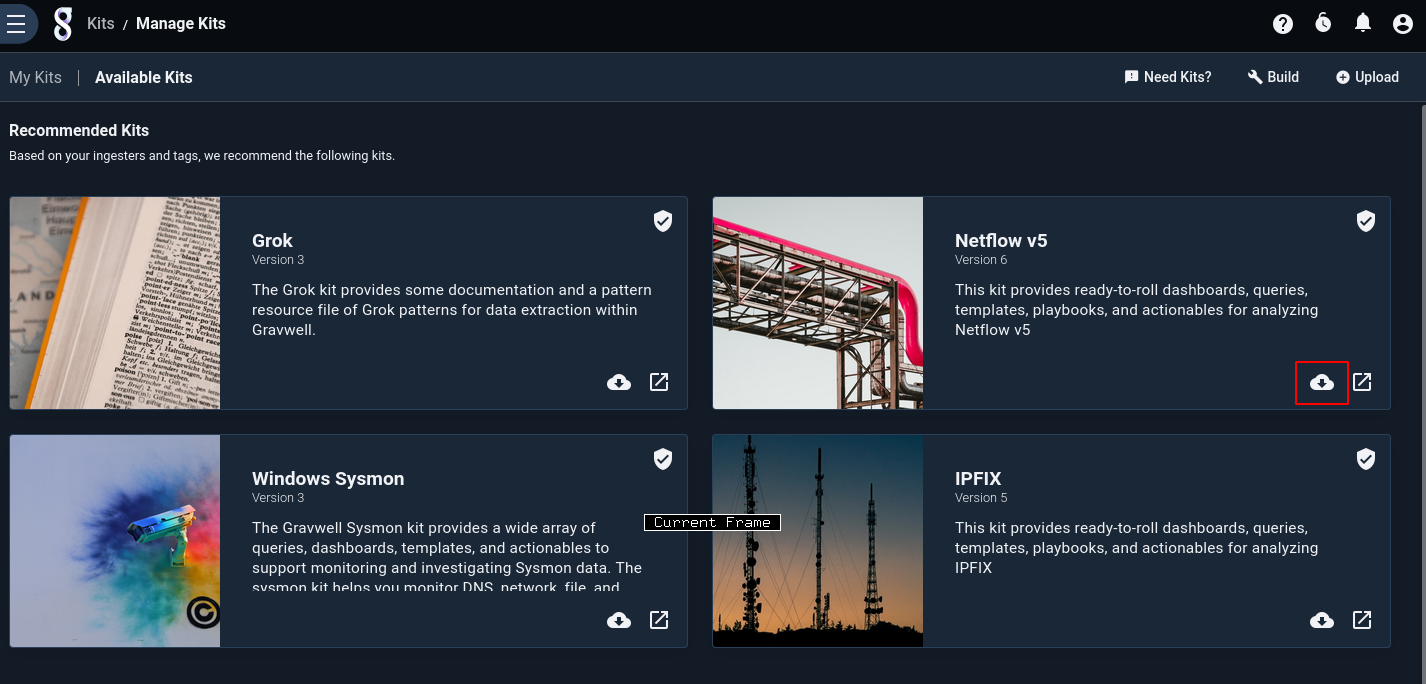
Use kitctl to unpack it, then check the initial state into Git so we can track changes:
$ mkdir /tmp/netflow-kit && cd /tmp/netflow-kit
$ kitctl unpack ~/Downloads/Netflow\ v5
$ git init .
$ git commit -m 'initial commit'
$ ls
dashboard file MANIFEST pivot playbook searchlibrary template
Kitctl creates some directories (one for each category of item within the kit, e.g. dashboard) and a file called MANIFEST which contains information about the kit as a whole (kit ID, description, dependencies).
Modify the Kit
The kit contains a single 'user file', which kitctl splits into two files on disk: a metadata file, and a binary 'contents' file:
$ ls file
48c6b0ef-6e76-4208-bca7-0b95e4700bdd.contents
48c6b0ef-6e76-4208-bca7-0b95e4700bdd.meta
john@thufir:~/netflow-kit$ cat file/48c6b0ef-6e76-4208-bca7-0b95e4700bdd.meta
{
"GUID": "48c6b0ef-6e76-4208-bca7-0b95e4700bdd",
"Name": "Netflow playbook cover",
"Desc": "Cover image used for Netflow v5 playbook",
"Labels": null
}
By reading the metadata, we discover that this file is used for the cover image on the Netflow playbook. We can change out the image by copying a different image into the .contents file:
$ cp ~/newcover.png 48c6b0ef-6e76-4208-bca7-0b95e4700bdd.contentsWe can also modify the MANIFEST file a bit, renaming the kit, changing the description, and setting the Icon/Banner/Cover fields to point at the userfile. Normally, "official" Gravwell kits pull their cover image from the Gravwell kitserver, but since we are building our own unofficial version, we should provide our own:
$ git diff
diff --git a/MANIFEST b/MANIFEST
index 4ab2f00..c159046 100644
--- a/MANIFEST
+++ b/MANIFEST
@@ -1,7 +1,7 @@
{
"ID": "io.gravwell.netflowv5",
- "Name": "Netflow v5",
- "Desc": "This kit provides ready-to-roll dashboards, queries, templates, playbooks, and actionables for analyzing Netflow v5",
+ "Name": "John's Amazing Netflow Kit",
+ "Desc": "Hand-crafted by me!",
"Readme": "",
"Version": 6,
"MinVersion": {
@@ -14,9 +14,9 @@
"Minor": 0,
"Point": 0
},
- "Icon": "",
- "Banner": "",
- "Cover": "",
+ "Icon": "48c6b0ef-6e76-4208-bca7-0b95e4700bdd",
+ "Banner": "48c6b0ef-6e76-4208-bca7-0b95e4700bdd",
+ "Cover": "48c6b0ef-6e76-4208-bca7-0b95e4700bdd",
"Items": [
{
"Name": "068864a8-a365-43dd-af12-efd940270e25",
Add to the Kit
Perhaps we have built a particularly useful Netflow-based query and wish to include it in the kit. Here's one I prepared earlier, an extremely powerful and userful query indeed: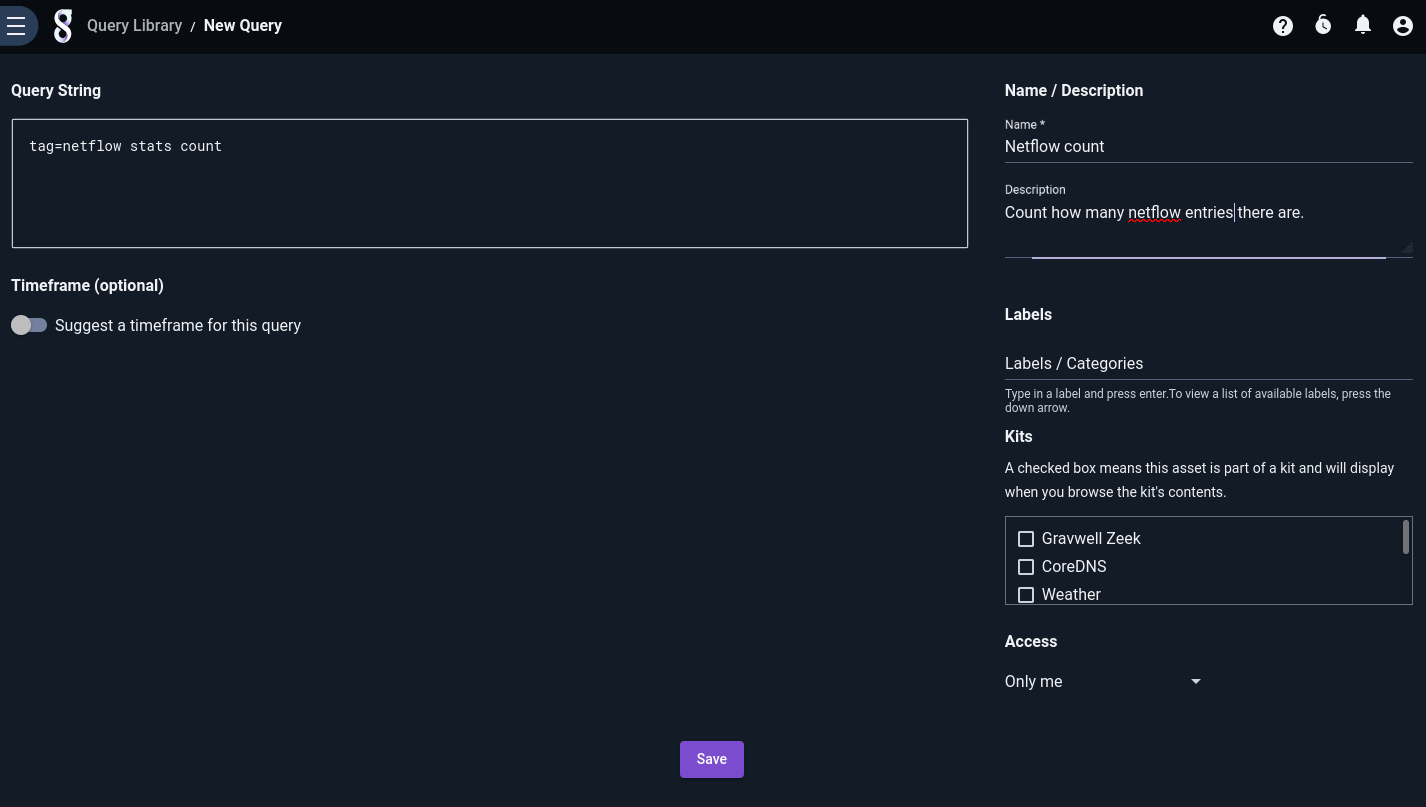
To get this new query into the kit, the easiest thing to do is to build another kit containing only that query and import that kit using kitctl. Because this new kit is only temporary, there is no need to put great effort into the name/description/README etc.: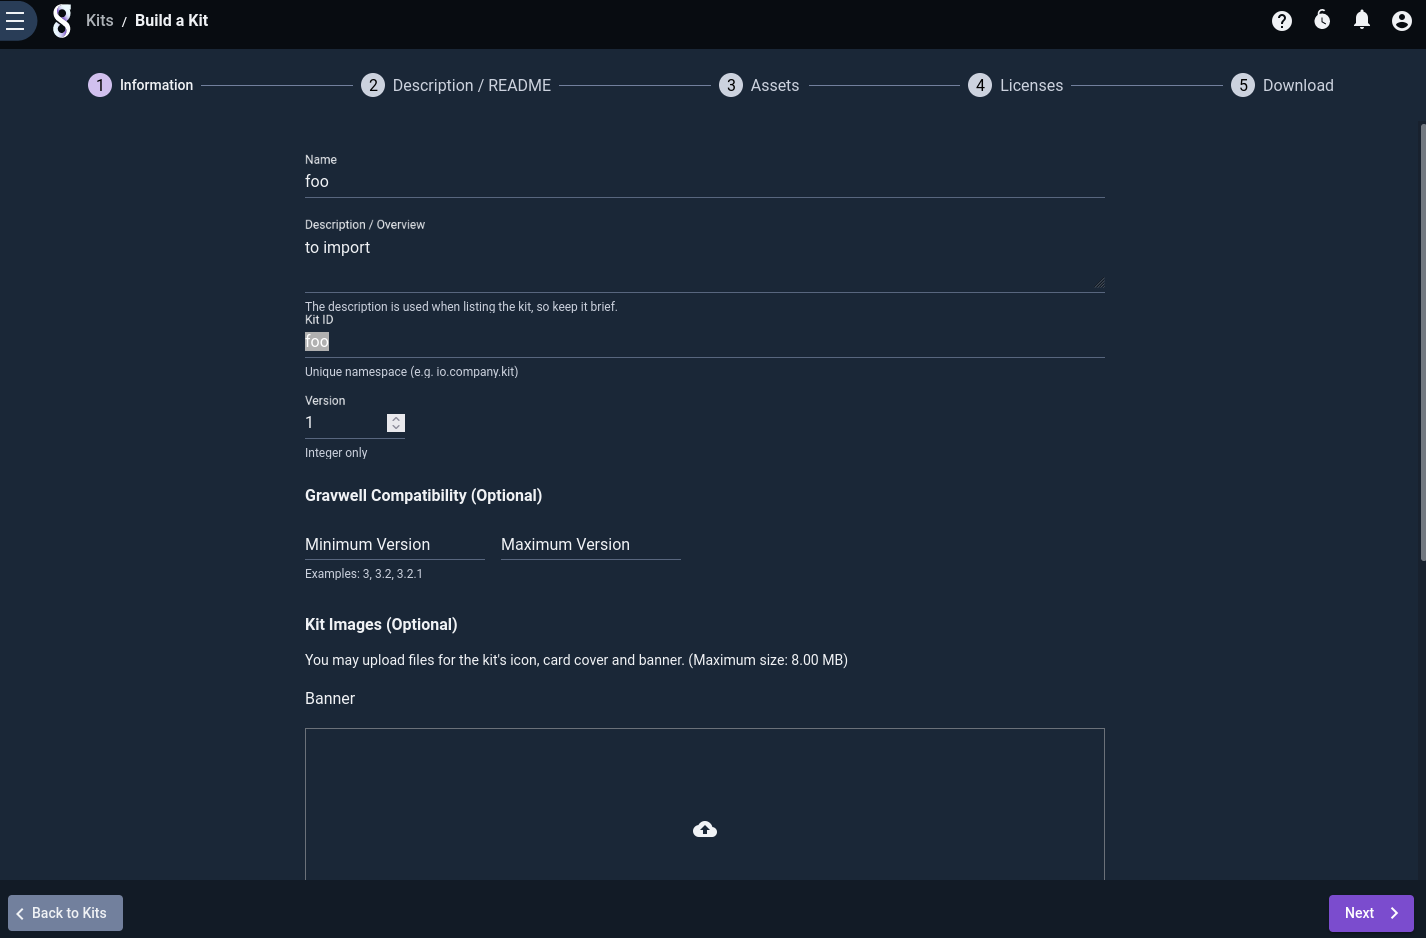
The important thing is to select the new query and any other items you may want to import into the kit: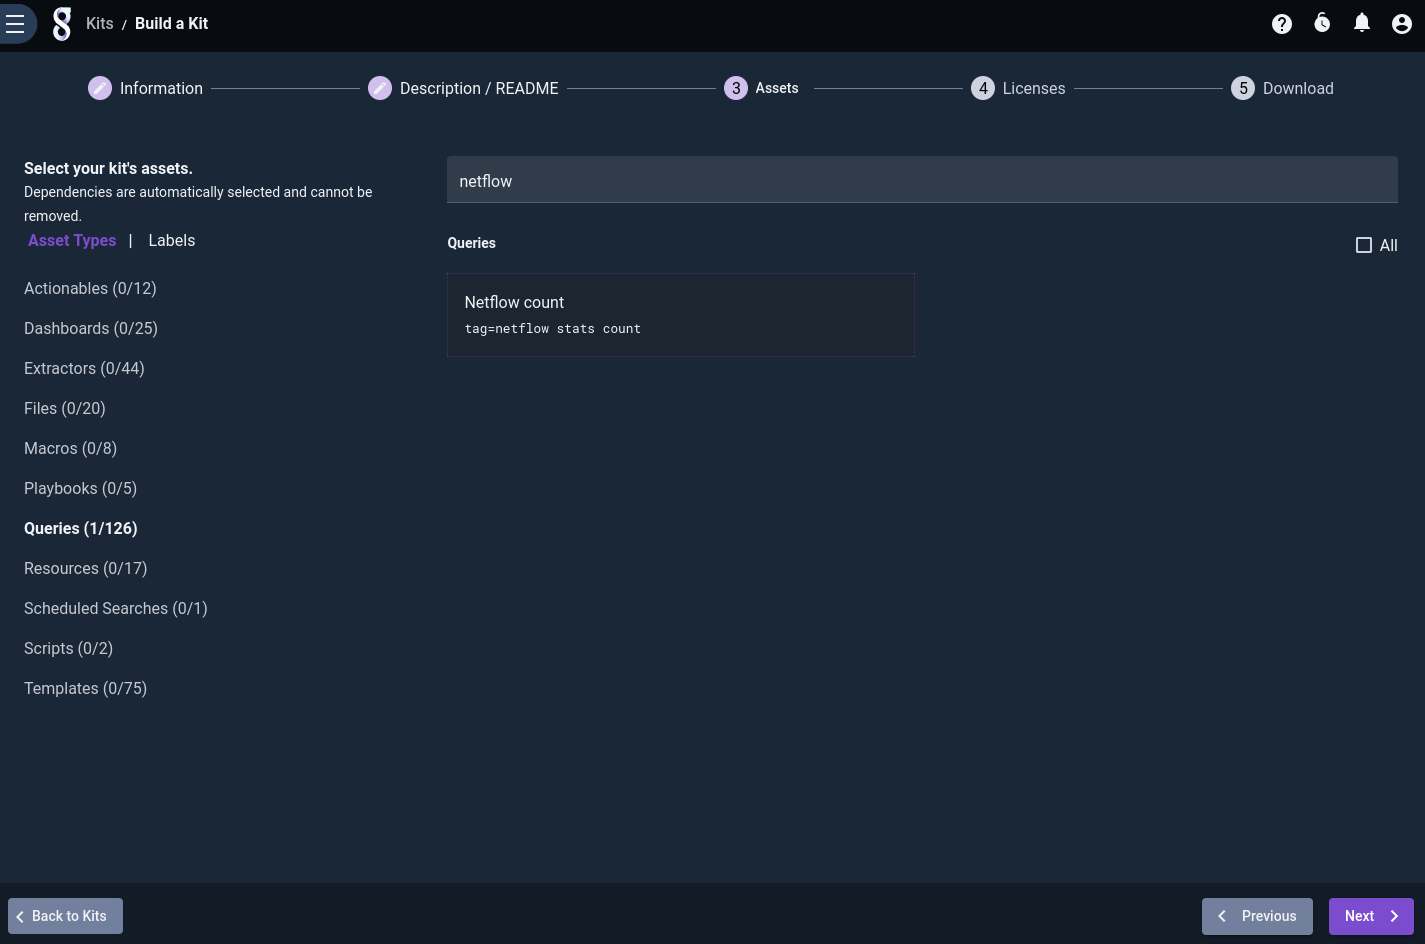
Once the kit is downloaded, we use kitctl's `import` command to merge the items from that kit into the existing kit:
$ kitctl import ~/Downloads/foo
2021/10/08 10:00:12 Importing new kit item 89ae3a4a-6a43-4e5a-a88f-906053124d2a
$ git status
On branch master
Changes not staged for commit:
(use "git add <file>..." to update what will be committed)
(use "git restore <file>..." to discard changes in working directory)
modified: MANIFEST

Untracked files:
(use "git add <file>..." to include in what will be committed)
searchlibrary/89ae3a4a-6a43-4e5a-a88f-906053124d2a.meta
searchlibrary/89ae3a4a-6a43-4e5a-a88f-906053124d2a.query
We see that there is a new entry in the `searchlibrary` directory, and the MANIFEST has been modified automatically to include the new item.
Repack the Kit
Now that we've modified the kit, it's time to repack it and try installing it in Gravwell. Repacking the kit is a matter of calling kitctl pack and telling it where to put the resulting kit file:
$ kitctl repack /tmp/updated.kitThen we can use the 'Upload' button in the kit management page to upload the kit and begin installation. We see immediately that the kit has the new name, and scrolling through the list of queries we can find the newly-added one: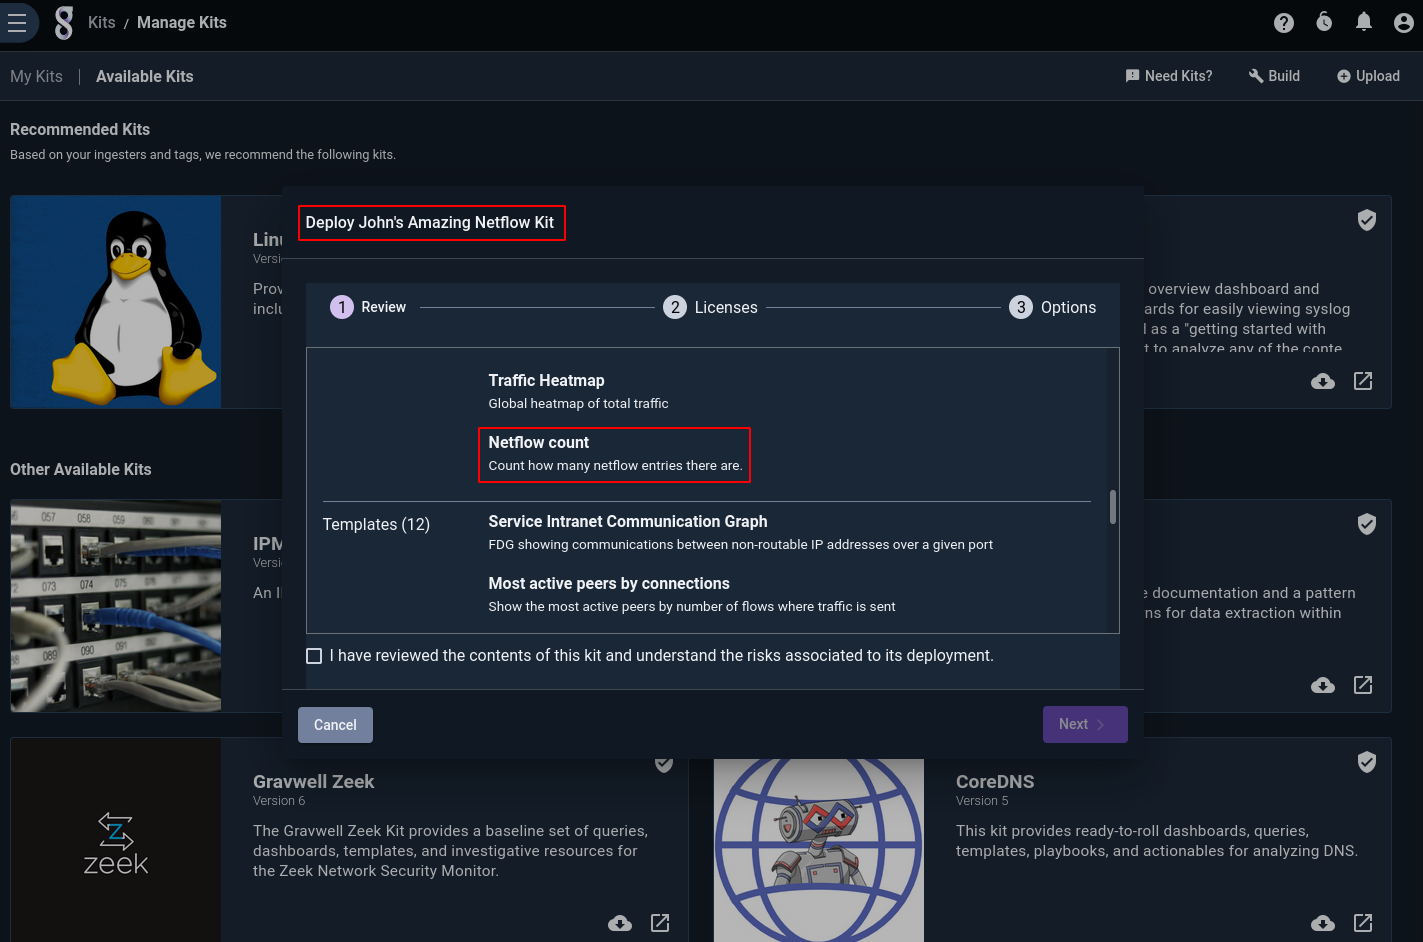
After installation, we can open the playbook and see that the boring original cover image has been replaced:
And if we look at the list of kits, we see that the Netflow kit now sports that same image as its cover: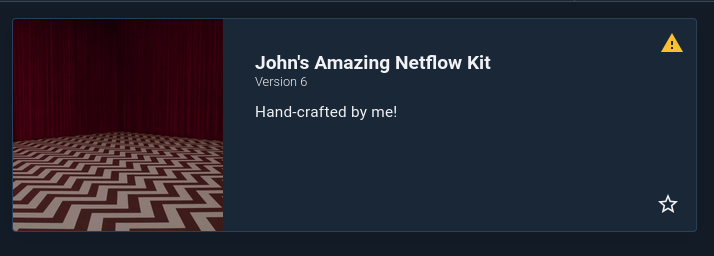
Other Kitctl Tasks
There's more functionality in kitctl than we can cover in this blog post. Besides unpacking, importing, and repacking, kitctl can also manage kit dependencies and config macros. Run kitctl help to get started. The beauty of working with your kit in a Git repository is that it's very difficult to truly break anything, as long as you remember to commit your changes as you go!
Conclusion
Kitctl opens new possibilities for kit development and collaboration. We're excited to see what the community and our partners come up with using this tool!
John's been writing Go since before it was cool and developing distributed systems for almost as long.